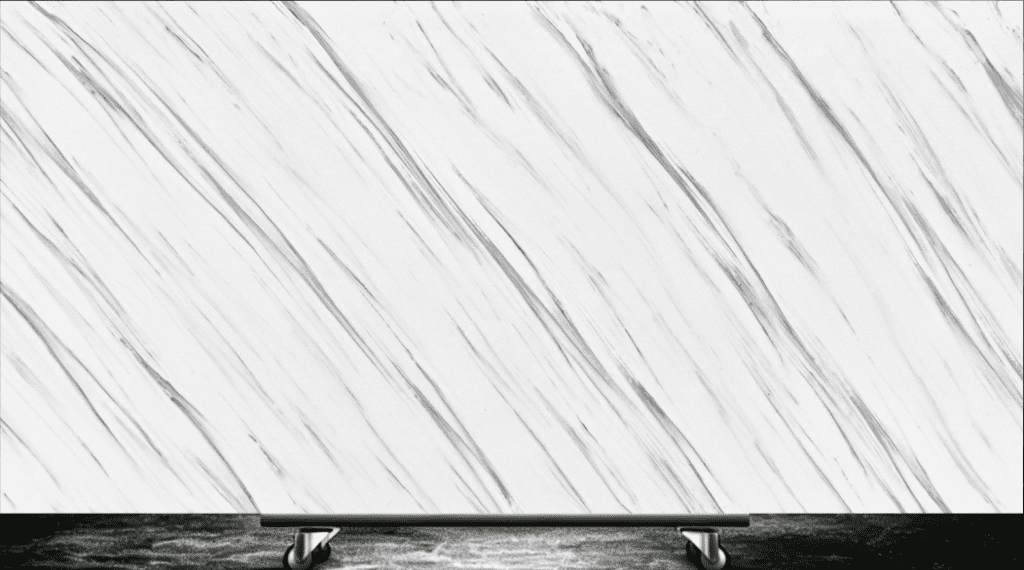
A marble-look or directional solid surface sheet can transform a countertop, but ordering enough material by area alone does not guarantee an acceptable result. Veins may change direction across a sheet, stop at a joint or appear different on an exposed edge. A layout review before cutting helps buyers, designers and fabricators agree on both appearance and cost.
Why a small sample is not a cutting plan
A sample helps assess colour, finish and the general style of a pattern. It cannot show every vein on a full sheet or guarantee how two separate sheets will meet. Some patterns are subtle and irregular; others have strong directional lines. Ask for full-sheet photographs or an in-person review of the actual sheets when the appearance of a large surface is important.
Check the product code, batch and finish as well. Same-batch material may reduce variation, but it does not automatically make veins continuous. Inspect the intended face of the sheets under the project lighting and obtain written acceptance of the proposed arrangement before fabrication.
Start with the drawing and constraints
Give the fabricator a dimensioned plan showing finished sizes, cabinet positions, openings, visible edges, wall returns, appliance locations and access to the installation site. Note which areas are most visible from the room entrance. The fabricator can then assess the sheet format, pattern direction and practical seam locations.
Seam positions must also meet the specific material manufacturer’s fabrication guidance, including requirements around cutouts, inside corners, heat sources and support. Moving a joint for a prettier pattern is only an option when the revised construction remains suitable for the application.
Review the actual sheets before cutting
- Identify the visible face and mark a consistent orientation on each sheet. Photograph the full surface with the sheet number visible.
- Place the planned components on the sheet photographs or use a dry layout on protected sheets. Mark the front edge, vein direction, seams and any returns.
- Compare adjacent pieces under suitable lighting. A joint can be well bonded while a vein still visibly stops or changes direction.
- Review alternative seam locations and rotation options that meet the manufacturer’s fabrication rules. Keep customer-approved reference photos and the drawing together.
- Allow for edge strips, splashbacks, trimming, cutouts and a sensible contingency. Confirm whether any spare material is included.
Dry layouts are visual planning tools, not a substitute for the fabricator’s approved joining and installation methods. If a feature is critical, agree on a physical mock-up made from the actual material and finished to the intended sheen.
What happens at seams and edges?
Seams: matching adhesive and careful fabrication can make the joint line less conspicuous, but they cannot guarantee a continuous random vein across different pieces. The stronger the contrast or direction, the more noticeable a break may be. Decide what is acceptable from normal viewing positions before production.
Built-up edges: a laminated or stacked edge may expose the sheet’s cross-section. Its pattern can look different from the face. A mitred or folded appearance may be possible for some designs, but feasibility depends on the product, radius, tooling and the fabricator’s methods. Ask to see an edge sample before choosing.
Returns and splashbacks: even with a carefully planned top, the vertical pieces may not continue the same vein. Mark each return on the drawing and review the intended visual transition. Do not assume the sink cutout offcut will provide a matching edge or enough usable material.
Why two quotes can use different numbers of sheets
Consider an L-shaped counter with a prominent front edge and a backsplash. One layout may use less material but place an obvious vein break near the main viewing area. Another may rotate or replace pieces to improve the appearance, use more sheet and leave larger offcuts. Neither price is comparable until the drawings, seam positions, edge construction and appearance expectations match.
Ask each supplier for the sheet count, sheet size, layout or nesting plan, seam and edge details, fabrication scope, offcut treatment and the assumptions behind the quote. Avoid applying a universal waste percentage: project dimensions, pattern, cutouts and the desired appearance all affect yield.
A short approval checklist
- Confirm the material grade, colour code, thickness, finish and required quantity.
- Review actual full-sheet images or sheets, including batch identifiers and visible faces.
- Approve vein direction, major components, seam positions, edges and returns on a marked layout.
- Agree how visible pattern breaks will be evaluated, under what lighting and from which viewing position.
- Request an actual-material mock-up where appearance is critical, and agree any changes before cutting.
- Confirm sheet count, spare material, responsibilities and what happens if the layout needs revision.
For broader joint preparation, read our guide to solid surface joints. For project-specific advice, share the drawing, pattern reference and intended edge with KSTONE so we can review the layout and quote assumptions with you.
Technical references: Corian® veined aesthetics fabrication bulletin and Corian® positioning of seams. These references apply to the products they identify; always follow the chosen material manufacturer’s current instructions.